
Most homeowners have no idea what actually happens during a basement waterproofing job. They get a quote, sign a contract, and four to six weeks later a crew shows up. This post walks through the four-day timeline for a typical interior drainage installation in a 1,400 square foot basement in Fairfield County, with notes on what to expect and what to ask about.
Before Day 1: what happens between contract signing and crew arrival
From signed contract to crew arrival in our Connecticut and Westchester markets typically runs four to six weeks during peak season (March through July), two to four weeks off-peak. During that window we file any required local permits, order materials (pump, basin, vapor barrier, gravel, pipe), and confirm utility marking before any excavation work.
About a week before the install date, a project coordinator calls to confirm scope, walk through what to move out of the basement (furniture stays; stored items along the perimeter walls need to come off), and confirm access (where the crew will stage materials, where the dust shrouds will mount, where the discharge line will exit).
Day 1: Demo and trench cutting
The crew arrives between 7:30 and 8:00 AM with a concrete saw, a small jackhammer, and contractor-grade dust shrouds. The first task is cutting a six to eight inch wide channel in the concrete slab along the inside perimeter of the affected walls. This is the loudest, dustiest day of the project. Plan to be out of the house if you can, or at least keep doors to the basement closed.
By late afternoon the channel is cut, the concrete debris is removed (we haul it out, not the homeowner), and the soil beneath is excavated down to the bottom of the footing.
Dust management is the biggest single difference between a professional install and a generalist install. We use HEPA-filtered air scrubbers running continuously, plastic sheeting at the basement stairs, and shoe covers at the threshold. Dust travel into the living space above is the most common complaint after a poorly managed install; on a well-managed install it is barely noticeable.
Day 2: Drainage system installation
The drainage system goes in. This is typically a perforated pipe (rigid PVC or specialty drain board, depending on the wall condition) sitting on a bed of clean gravel inside the trench. The pipe gets wrapped in a filter fabric to prevent silt clogging, then more gravel goes on top.
If the project includes a sump pump install or replacement, the new basin is dug in on Day 2 as well. The discharge line gets routed to the exterior, with frost-proof fittings at the wall penetration.
Standard component spec on our jobs:
- Sump basin: 18-inch diameter minimum, 24-inch for higher-volume sites.
- Primary pump: Zoeller cast-iron 1/3 or 1/2 HP, 4,200 GPH rated at 10 feet of lift.
- Backup pump: Battery-backup unit, 2,000 to 2,500 GPH at 10 feet, with deep-cycle marine battery.
- Perimeter pipe: 4-inch perforated PVC or DMX drain board against the wall.
- Gravel: Clean 3/4-inch crushed stone, washed.
- Vapor barrier: 20-mil reinforced poly, mechanically fastened to the wall.
Day 3: Wall vapor barrier and concrete patch
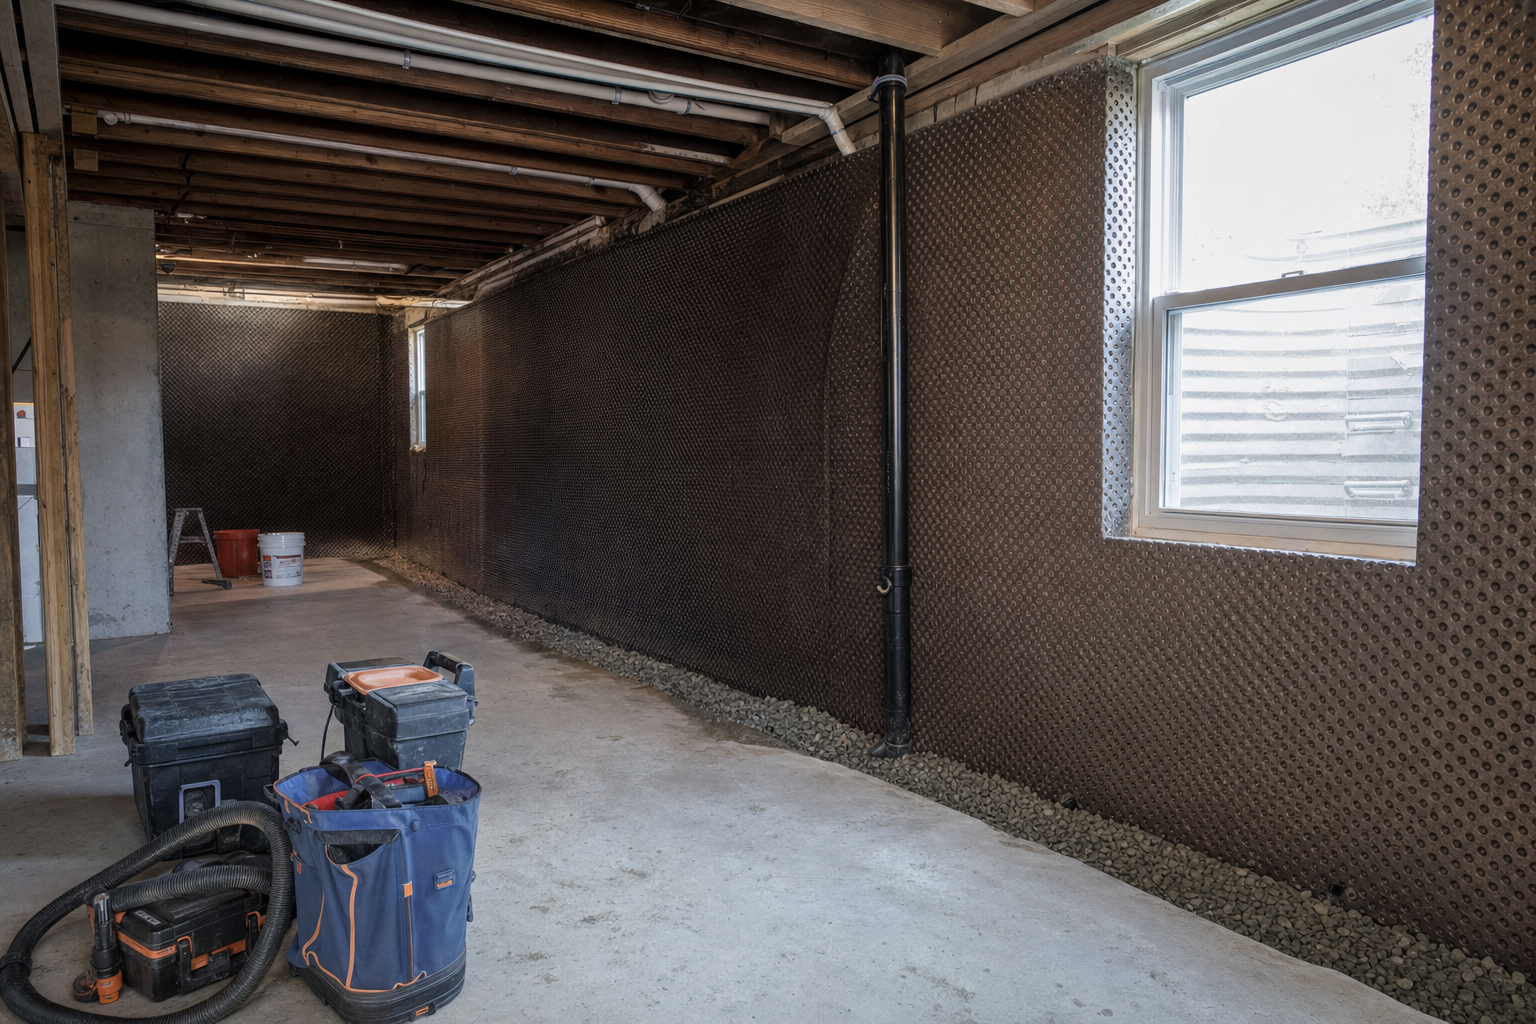
A dimpled plastic vapor barrier is installed against the wall surface, hanging down into the trench. This routes any wall seepage down into the drainage channel instead of out onto the basement floor.
New concrete is poured over the gravel to restore the slab. Most jobs use a high-early-strength mix so it can be walked on within 24 hours. The finish is troweled smooth and feathered into the existing slab edge.
Concrete cure note: full structural cure takes 28 days. The slab is walkable within 24 hours and can support stored items within a week. Avoid placing heavy permanent items (workbenches, freezers) on the new pour for at least two weeks.
Day 4: Sump pump finish, cleanup, and walkthrough
The sump pump is wired in, tested under load (we run the bucket test in front of the homeowner), and the cover plate is installed. The discharge line gets a final freeze-protection check at the exterior.
The basement gets a thorough cleanup, plastic sheeting comes down, and we walk through the system with the homeowner. We explain what to expect from the pump (how often it cycles, what sounds are normal, when to call us), point out the cleanout access, and review the warranty documentation.
Final payment is collected after the walkthrough, not before.
What you should ask before you sign
- Is the drainage system pipe or drain board? Both work; the right choice depends on wall condition.
- Is the sump pump warranty separate from the workmanship warranty?
- Is the discharge line freeze-protected at the wall exit?
- What is the cleanout access plan if the system ever needs flushing?
- Are concrete patches feathered into the existing slab or do they leave a visible step?
- Is the vapor barrier mechanically fastened (best) or just adhered (lower-cost but fails sooner)?
- What is the manufacturer and model of the pump and basin?
- Is the warranty transferable to a future buyer?
A contractor who cannot answer those clearly is not the one you want.
Common mistakes we see on competitor jobs
- Undersized basin. A 12-inch basin in a basement that produces high spring flow short-cycles the pump and burns the motor windings within two years.
- Thermoplastic pump body. Plastic-body pumps run hotter than cast iron and fail sooner under continuous duty.
- Discharge line dumping at the foundation. The pump moves water from the basin to the wall, where it soaks right back through. Discharge must terminate at least 10 feet from the foundation, on a graded surface or in a dry well.
- No battery backup. Storms that flood basements are exactly the storms that take out grid power. A primary-only pump install is incomplete.
- Vapor barrier glued, not fastened. Adhesives fail within 5 to 8 years under continuous humidity. Mechanical fasteners last decades.
- No filter fabric on the perforated pipe. Silt clogs the perforations within 2 to 3 years. Replacement requires re-trenching the slab.
Cost expectations
For a 1,400 square foot basement with full perimeter interior drainage and a new sump pump, typical CT and Westchester pricing in 2026 is in the $9,000 to $14,000 range depending on access, wall condition, and existing slab thickness. We put every number in writing before you commit.
Three drivers move the number within that range:
- Perimeter length. A square basement has less perimeter per square foot than a rectangular one. Linear feet of trench is the biggest single cost driver.
- Wall material. Poured concrete is the easiest to work against. Block adds difficulty. Fieldstone or rubble stone adds substantial labor.
- Access conditions. Finished basements that need framing or drywall removed run $1,500 to $4,000 more. Hard-to-reach utility rooms add time and labor.
Warranty terms that matter
Our standard interior drainage warranty:
- Workmanship: Lifetime transferable on the drainage system itself.
- Pump: Manufacturer warranty (typically 3 to 5 years for Zoeller).
- Battery: 1 to 3 years depending on type.
- Concrete patches: 2 years against cracking or settling.
The lifetime transferable workmanship warranty is the most important piece. It transfers to the next owner, which becomes a documented selling point if you list the home later.
FAQs
Can we live in the house during the work?
Yes. Most of our customers stay home during the project. Day 1 is loud and dusty; close the basement door and keep the bedrooms above the work area closed. Days 2 to 4 are much quieter.
Do you take care of permits?
Most CT and NY towns do not require permits for interior basement drainage work. Where permits are required (some specific towns), we handle the filing and inspection scheduling.
What if you find something unexpected during the work?
We stop, document with photos, and call you before continuing. Common unexpected findings: hidden buried utilities, footings shallower than expected, voids under the slab. Each adds time and cost; both are discussed and approved before the work continues.
Will the new system be visible after we finish the basement?
The drainage channel is buried under new concrete; nothing is visible at the floor. The vapor barrier on the wall is visible until you frame and drywall over it. The sump basin cover is flush with the slab. If you plan to finish the basement later, frame the walls leaving a 1-inch gap from the foundation to keep the vapor channel active.
Book your free inspection
No obligation. Written estimate within 24 hours.
Tell us what is happening with your basement and we will email a written estimate within 24 hours. No cost, no obligation, no high-pressure follow-up.
Get a Free Inspection